How to take Photos with Natural light
Beginner Tips and Natural Light Photography Examples
Article By Author and Professional Photographer Orlando Sydney
Natural light Photography is Creative and versatile
Light, specifically natural light and how to harness it to create striking compositions, is one of the first things you’ll need to learn about as a beginner photographer.
Light is absolutely key to photography. Quite simply, photographs cannot exist without light.
Traditional film cameras and modern digital cameras may feature wildly different operational templates but the fundamentals remain the same; neither have been able to find a substitute for light. Or stumble across a way to take visually appealing photographs in the complete absence of light. Unless you’re creatively making black frames.
Just in case you haven’t gotten the gist yet, having a clear understanding of the various ways in which light affects photographs. And the sources of light in relation to photography (both natural light and artificial light) along with their various applications, will go a long way towards helping you become a more accomplished photographer.
Master light, master photography. Study the detail in this article to help you capture amazing photographs.
Table of Contents – Jump to Headings
- How to take Photos with Natural light
- Beginner Tips and Natural Light Photography Examples
- Natural light Photography is Creative and versatile
- Fundamentals of Natural light
- What Is Natural Light?
- How to work with Harsh Natural Light in Portrait Photography
- How does the properties of Light relate to Photography?
- Comparing; Hard light Vs Soft Light Examples
- 6 Types of Natural Light Explained
- Natural Soft Light Photo Examples
- Tips for Using Natural Light in Photography
- 8 tips Guide to Mastering Natural Light
- Window Light Example Photo
- Making Daylight Full Sun photography work for you Creatively
- Natural Light in Action for Different Photography Genres
- Creatively use Dapple light in Landscape photography
- Have you seen the light in a different way now?

Rainbow over Natural grass landscape in Natural Soft Outdoor Light
Table of Contents
- Beginner Tips and Natural Light Photography Examples
- Natural light Photography is Creative and versatile
- Fundamentals of Natural light
- What Is Natural Light?
- How to work with Harsh Natural Light in Portrait Photography
- How does the properties of Light relate to Photography?
- Comparing; Hard light Vs Soft Light Examples
- 6 Types of Natural Light Explained
- Natural Soft Light Photo Examples
- Tips for Using Natural Light in Photography
- 8 tips Guide to Mastering Natural Light
- Window Light Example Photo
- Making Daylight Full Sun photography work for you Creatively
- Natural Light in Action for Different Photography Genres
- Creatively use Dapple light in Landscape photography
- Have you seen the light in a different way now?
Fundamentals of Natural light
Natural light photography can be either of two polarizing extremes. On one hand, it is a fairly basic and commonplace practice. When you consider the fact that the vast majority of photographs are taken this way, and that it seemingly requires minimal skill, the concept becomes a lot less daunting.
On the other hand, natural light photography entails mastering the characteristics and behaviours of natural light. Essentially, natural light photography requires that you not seek out the perfect lighting conditions but arrange your composition to entice and enchant irrespective of available natural light.
As you can imagine, that’s easier said than done. That’s why we’ll be shedding some light on the whole concept of natural light photography, with the express aim of helping you understand suitable lighting and how properly identifying it will improve your ability to create spellbinding compositions.
From brooding, sombre low light emotive photos to punchy powerful striking photos, the common denominator is light and how you use it.
So then, to the question that must be at the top of any aspiring proficient photographer’s mind at this point. What exactly is natural light photography?
What Is Natural Light?
Natural light simply refers to any light created from sunlight, and it’s the most basic form of light. Natural light is also taken to include ambient lights – which are lights that you’d naturally find in an environment, such as lamps, street lights, ceiling lights, etc.
Basically, natural light usually indicates lights that have not been directly generated by the photographer’s lighting equipment.
As we mentioned earlier, there are no restrictions to the use of natural light when taking photographs (except complete darkness, of course), and most people, from world class photographers to grannies with smartphones, do use it.
Earlier, we also mentioned something about the characteristics and behaviours of the sun and this is a good time to explore those in detail. Learning how the sun behaves at various times during the day, as well as how it’s influenced by the weather, will leave you in a better position to understand light and harness it properly.
“Light is absolutely key to photography. Quite simply, photographs cannot exist without light.”
Characteristics and Behaviours of Natural Light
The sun changes constantly as it makes its daily voyage across the sky. We don’t need to be astrophysicists to know that the light from the sun is brighter (brightest) at some point during the day and dimmer at others, and that the heat is more intense at some point and less intense at others. We also know that the sun follows a well established trajectory every day, like clockwork.
This knowledge is what was distilled into the four main characteristics that define natural light as we know it, which are colour, intensity, direction, and quality.
In the next section let’s get into the detailed explanation of what exactly is natural light.
What are the characteristics and tips on how you can harness it’s power for amazing photos.
Let’s expand on this in detail with the 4 primary characteristics.
How to work with Harsh Natural Light in Portrait Photography

A photography tip is you can use a Scrim or Umbrella to work in harsh direct Daylight
How does the properties of Light relate to Photography?
List of the main 4 properties of light in photography
- Colour Temperature
- Light Intensity
- Softest Light
- Light Direction
- Quality of Light
1 – What is Colour Temperature?
Have you noticed how some pictures appear to have a cool, blue tinge while others have warmer tones?
This is one of the effects of colour temperature. Depending on what time a picture is taken, the prevalent lighting conditions produce different colour shades. The cool blue-tinged hue and warmer, reddish colour are opposite ends of the Kelvin scale, with which colour temperature is measured.
As we said, colour temperature depends a lot on the time and the presence of clouds in the sky. It also changes rapidly throughout the day. Usually, the sky adopts a bluish coloration at dawn and at dusk, while it takes up an orange appearance at sunset. Photographers call this brief sunset moment the golden hour. Or attentively the blue hour.
Kelvin is simply described as the base unit of (absolute thermodynamic) scale of temperature, expressed in the letter “K”. More detail on Kelvin here [Wikipedia]
For example 3200 K appears more yellow and reddish than 7500 K which is bluish in tone. We shoot exclusively at 5100 k which is about midday colour temperature. We only shoot in raw and make adjustments in post processing from this midway point.
One easy way to remember this light principle is to remember how LED or compact fluoro light bulbs are graded into colour temperatures. Warm or cool. Or are sometimes expressed in camera settings as sunny, cloudy, tungsten, etc.
Kelvin colour temperature example; Photographing portraits in natural light at 4pm in early spring, the colour temperature we start the shoot at is around 6300 K, an hour later to get the same warmth or coolness in the photo is now processed at 6800k. Try it for yourself.
Experiment and shoot at various ‘K’ colour temperatures and see what works best for you.
2 – What is Light Intensity in relation to photography?
Intensity specifies how much light is available in any given scene. In a way, intensity is the quantity of light that makes up a composition, measured by how bright or harsh it is.
It’s pretty easy to size up the intensity of light in a scene. All you need to do is compare the areas in the scene that are not illuminated by the light (the shadows) and the areas that are (the highlights) and gauge the balance. This little exercise is known as finding the contrast.
If you’re looking to make the shadows in your photograph more striking, the best time to take the picture is at noon, when the intense, overhead light makes contrast high. The light is less intense at dawn and dusk, so contrast will be pretty low between those hours.
3 – The light outside tends to be softest at what time of day?
Dawn and dusk provide the softest even light intensity. Similar to when it is a medium to heavy overcast day. Soft non directional light versus intense direction light that has a high differentiation of light between shadows and highlights.
When working with light intensity careful consideration should be given to not exceeding your camera’s sensor dynamic range.
The highest light intense parts of your photos should not exceed or be near 255 digital bit depth scale which represents the maximum white light level in camera technology and post processing. This is in contrast to the ‘000’ value which is perfect black. Keep within 5-10 points of maximum dynamic range and you should be ok with recovering details in the photo near the extremes of visible light intensity.
4 – What do you mean by Light Direction for Photography?
The sun changes positions several times as the day progresses, and as it moves, the direction of light flips right along with it.
So, it’s quite possible to end up with completely different pictures of a scene when you take photos of it at different times of day. For instance, a landscape photograph may look one way at sunrise when the sun is almost horizontal with the horizon, another way at noon when the sun is nearly vertical, and yet another way at dusk.
You can use directionality to accentuate characteristics of a scene or to make them appear flat and 2 dimensional.
For example when the sun is at 90 degrees, i.e. straight above you will not get any shadowing giving the appearance of a very flat stark landscape lacking in eye interest and appeal.
Whereas at either 9am or 3pm is will cast some strong shadows giving it some depth and creating extra depth to add to the interest s it now has a more 3D dimensionality to is and we can judge this extra dimension and now associate it with not only width and length but now depth which makes landscape photography a lot more appealing.
5 – What does Quality of Light mean for Photographers?
Quality is measured in relation to the subject and light in a photograph and it comprises all the other characteristics of natural light.
Quality is usually represented as hard/direct or soft/diffused, depending on the amount of light present in a picture.
Let’s explain this a little. If the source of light in a photo is smaller than the subject, the quality of light is said to be hard. On the flip side, if the light overshadows the subject, the quality is soft.
Having learnt the characteristics and behaviours of light, the next step is to find out the different types of natural light.
Before we go there, however, it’s important to emphasize that instead of seeing any kind of light as bad, you should instead look at light as being either suitable or not suitable for the photo composition you’re trying to craft. Because really, there’s no bad light.
Small camera flashes or Speedlight as Nikon calls them sometimes get referred to as hard light and or poor quality of light. Reason people say that is because the actual light tube that creates the flash is very small and the reflective chamber is also very small relative to the subject of a portrait shoot for example.
Light modifiers, i.e. something you place in front of a flash tube will help disperse the light into a large apparent light source and now it is called soft light and better quality of light. (better if it is the desired look in your creative process)
So the term quality of light in photography has its various definitions and varied practical purposes.
Read More

Live Event Photo Gallery Sydney | Real Time Photo Delivery for Corporate Events
Orlando Sydney2026-07-17T13:09:38+10:00

Crown Towers Sydney Event Photography
Orlando Sydney2026-07-20T15:25:33+10:00
Doltone House Event Photography & Video
Orlando Sydney2026-07-20T15:25:47+10:00
Event Vox Pops Sydney | Corporate Interview Videos for Conferences
Orlando Sydney2026-06-26T15:34:06+10:00

Corporate Event Videography Pricing in Sydney Australia
Orlando Sydney2026-06-26T15:41:49+10:00

Corporate Event Photography Sydney Australia | Orlando Sydney Corporate Photography
Orlando Sydney2026-07-10T13:29:55+10:00

Direct sunlight on earth clay cracks with harsh shadows contrasting the bright daylight. Compare the difference between light and dark.

Filtered sunlight on an overcast sky producing soft shadows inside the cracked dry earth. Compare the balanced transition from light to mid tone areas.
6 Types of Natural Light Explained
Depending on the effect you’re trying to create for your image, these are the types of natural light that you can use. We’ve described each of them based on their characteristics, so quite a few of them may already be familiar to you.
Hard/Direct Light
Hard/direct light sports a cool, bluish tinge early in the morning and warms up as the day progresses. In between, the light is a neutral white. In terms of intensity, the contrast is high, resulting in very well-defined shadows. Quality is hard, of course, and the direction of light is vertical to low.
The sun produces hard/direct light on cloudless afternoons, or just a few hours before sunset.
Since hard/direct light sharpens edges and shadow lines, you can exploit those elements and produce absolutely awesome images. Some of the options open to you include absorbing the shadows that fall on your subject or photographing the shadows that fall away from your subject.
Photographing Headshots in midday sun in summer will cause this hard light effect under their chin, nose and brow, not usually desirable. But it is up to the photographer to decide whether that’s the creative look they want so there is no right or wrong, only creative choices.
Soft/Diffused Light
Soft/diffused light differs from hard light in a number of ways. The light is a pastel colour at dawn, twilight, and dusk, and warmer in the afternoon. The contrast is very low, with mild shadows with a soft/diffused quality. The direction is low to below horizontal.
Soft/diffused light is produced by the sun when it makes its climb down the horizon, or on cloudy or overcast days. Light can also be softened by snow, air pollution, or fog.
The best way to maximize soft/diffused light is to photograph in an open shade. Under a tree, in a white tent or capture portraits under a scrim for example. Another great idea is to make your subject face the direction of light and shoot from different angles.
This will give portrait photos a softer consistent look with low contrast. Some consideration should be given to how flat an image you’d like as with diffused non directional light it can be very flat and not provide any contouring on the person’s face for example.
Reflected Light
As the name suggests, reflected light reflects off a surface or object, resulting in a softer glow. In terms of colour, reflected light adopts the colour of the surface it’s exposed to mixed a little with the colour temperature of the light itself. Contrast is soft and diffused, while the direction of light is equidistant to the angle of reflected light.
When working with reflected light, it’s important to have at the back of your mind that reflected light will be softer the rougher / textured the reflected surface is.
Some photography equipment such as reflectors you can hand hold, attached to the outside of a Speedlight or inside a flash head itself just may be textured for this reason. To scatter the light and soften it.
Natural Window Light and Tips
Window light is dynamic, with its appearance at certain points depending on a number of factors. For instance, its colour is largely determined by the time of day and how other colours reflect on the scene. Further, its intensity depends on how near or far the subject is from the source, while the direction of light is also dependent on where the window is located. Quality may be hard or soft, in relation to the above features.
Window light is great for indoor photography and can easily be tweaked by controlling the amount of light you let in. One way to do this is to cover the window with a transparent cloth, diffusing the light and minimizing light intensity.
Placing your subject close to the window will make the light wrap around them and bring them in focus. However, when you move the subject away from the window, the light creates a stronger contrast between the two sides of the face for portraiture.
You may have seen portraits or architectural design photography where the creative has used blinds or patterned window coverings to create an interesting high contrast photo utilising window light.
Window light for photography is a great option for creativity and it requires minimal photographic equipment and is free.
Dappled Light
Dappled light is a fun and deeply engaging way to take stunning photos. This type of light results from filtered sunshine through tree leaves creating splendid patterns on a nearby surface.
The colour of dappled light owes a lot to the time of day, while contrast depends on how near or far the subject is from the filter. Quality can either be hard or soft, and the light direction is mid to close to the horizon.
Dappled light can be used to draw attention to specific qualities of the subject and make images more striking and unforgettable. That said, it can be a bit hard to control, and some photographers tend to avoid it.
With planned careful timing of the day and weather conditions your local park or forest just may provide the perfect landscape to explore this amazing option.
Twilight
Twilight is the brief period before the rising of the sun and after it sets. In other words, it’s the transition between day and night. Twilight is one of the best moments for taking photographs, even though the diminished light may require that you use additional, artificial lighting. The colour is cool while contrast is soft/diffused and low.
Twilight is further divided into three categories including civil twilight, nautical twilight, and astronomical twilight.
When the sunlight is reflected down from the atmosphere it can create a surreal few minutes for photographers to take advantage of this mood lighting. Patience and good luck are required though as the weather, cloud cover and time of year will play a part in this being an option.
Natural Soft Light Photo Examples
Twilight photo at sunrise for a colourful soft sky with a landscape silhouette


Simple Casual Portrait in a forest giving a natural soft light on the model
Tips for Using Natural Light in Photography
Now that we’ve fairly comprehensively exhausted the “what” of natural light (and the different types), let’s talk about “how” you can use this knowledge to create astonishing images.
Once again, remember that there’s no bad light. What matters is for you to use available natural light creatively to craft visually appealing compositions.
8 tips Guide to Mastering Natural Light
Get the Light right
One of the hardest, yet most essential aspects of photography is finding the right balance between the position of your subject and the direction of the light. Get it wrong and you’ll be left with unattractive shadows on your subject’s face (if it’s a person). Get it right, however, and you’ll create a near perfect composition.
With this, don’t be afraid to experiment until you get it right. Try and try once more, until you find the perfect angle for the light to illuminate your subject. Depending on the effect you’re trying to create for your photograph, subjects can be front lit, side lit, or back lit.
1- Front Lit
For front lit photos, the sun is behind you as the photographer, directly reflecting the subject.
This type of lighting is especially useful for outdoor photography.
One major advantage of using this option is that this angle makes it almost impossible for shadows to form on your subject’s face. Just be aware of the light intensity and squinting of the eyes.
2 – Side Lit
Side lighting does cast shadows on your model’s face, so only use this angle if you’re trying to highlight specific features or create dramatic effects.
To side light a subject, you would need to illuminate it from the sides, either of them.
3 – Which lighting direction is used to create silhouettes, Answer, Backlit
Back lighting is great for outdoor portraits and can create really memorable images. Backlit subjects have the light illuminating them from behind and creating a soft glow with subtle shadows. This angle can also produce lens flares, shadows, and silhouettes to the subject.
4 – Overhead or Top and bottom lit
Strong lighting from directly overhead should in most instances or portraiture be avoided unless you’re going for a specific look. Same with lighting directly from under the face. That can look spooky and maybe just what you need others try to avoid.
Same with using a reflector, place it from what would be a natural position to light up your model. From near the ground is not usually recommended.
5 – It’s Always A Good Light
If you’re worried about the weather suddenly turning and ruining the planned conditions for your composition, don’t be. As we keep emphasizing, it’s all a matter of making the most of what nature presents you.
Even with those unplanned weather transformations, even if a clear and sunny day suddenly becomes cloudy and overcast, you can still create fabulous compositions. First, however, you need to have a clear understanding of how weather affects light. With this, you can look for ways to take advantage of available natural light. It’s what professionals would do.
Cloudy skies are no reason at all to call off a planned photography excursion. As a matter of fact, cloudy and overcast skies can create dramatic effects for your photos and make them more profound. A textured cloudy sky can help create an envelope and frame your subjects.
Having said that, it’s also a good idea to check out weather forecasts before you head out the door.
6 – Tips on Mixing artificial lights with natural light
Purists advise against mixing artificial lights with natural light, especially if you’re going to be shooting indoors. This is because both lights do not go particularly well together, and your subjects may end up being portrayed with unnatural skin tones due to the harshness or a disparity between the kelvin ranges of the two different light sources.
Nevertheless, a case can be made for mixing natural light with artificial lights, as long as the latter are used at appropriate distances. In some cases, you may need to provide more light in front of the subject than behind them (or it), and you’ll need to support the sunlight with artificial lighting equipment.
There are no rules prohibiting mixing natural and artificial lights. Just take into account the different intensities, direction, distance and temperature (Kelvin) of the two lights.
Your goal should be the creation of stunning images and if it requires mixing both lights, you should go for it.
7 – Use Reflectors, Diffusers, and Light Flags
Speaking of augmenting natural light, there’s another way to manage it, if you don’t want to use artificial light. You can enhance natural light by using reflectors, diffusers, and flags.
Reflectors ensure that there’s always more light in front of your subject than behind by bouncing sunlight towards it or them, in order to produce high contrast shots. The best thing about reflectors is that they’re pretty cost-effective and come in packs, with up to five different reflective surfaces included.
Like we explained earlier, a diffuser is a transparent material (or cloth) usually placed over the light source. Its effect is to soften transitions between highlights and shadows.
Flags, on their part, simply block off some of the light from the source. Black coloured materials are most commonly used as flags.
8 – Choose the Right Time
Naturally, this raises the question of when exactly is the best time to go shooting images.
It’s actually simple. If you’re looking for the best source of natural light, look no further than the sunrise or sunset. Or as most photographers call it, the golden hour.
The sun’s glow during sunrise and sunset is softest, filling the surrounding scenery with softer shadows and giving images a certain ethereal feel.
Perfect for cityscapes, landscapes and portraits with some artificial controlled lighting can make some Here Image types of photos.
Window Light Example Photo

Portrait utilising natural light from a window
Making Daylight Full Sun photography work for you Creatively
Daylight full sun being used creatively to highlight the juxta pose between light and dark

Natural Light in Action for Different Photography Genres
Natural light is effective, useful, and applicable in all genres of photography, albeit with different techniques across all.
Portrait photography using natural light
In portrait photography, people are your main subjects, whether you’re taking candid or staged shots.
Hard/direct light may create harsh shadows on the faces of your models, so it may not be the ideal light. Soft/diffused light is more appropriate for portraits for obvious reasons. That said, you can still create breathtaking compositions with hard/direct light when you take the portrait photograph from the sides.
Place your subject close to a window for memorable portrait shots too. Window light lets you adjust the quantity, quality and colour of the light, to pretty stunning effects. Finally, reflective light is also great for portraits. Also try under awnings, trees or the shade of high-rise buildings in a city.
Natural Light in Landscape Photography
In landscape photography, both hard/direct light and soft/diffused light work, depending on your vision for the image. Overcast days are some of the best days to take landscape photos, because the soft/diffused light dramatically increases the colour and texture of the scene, resulting in some seriously captivating images.
Hard/direct light is great for bringing details into focus and highlighting edges. The only thing you should avoid doing when using this light is shooting from the front. It lessens the impact of the shadows.
Sunset and sunrise photos are a favourite time for both cityscape shots and natural landscapes.
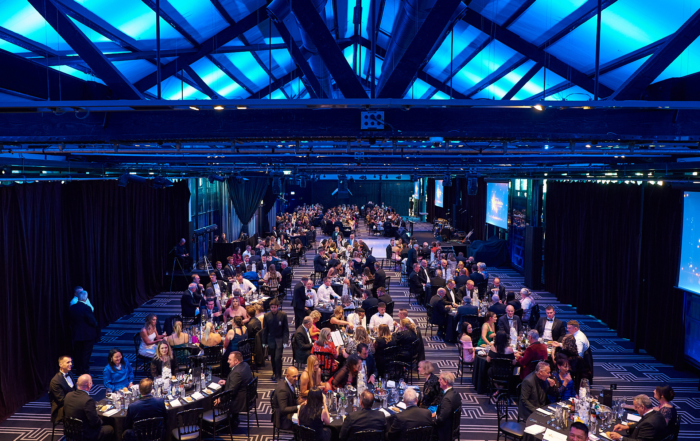
Event Photography in Natural Light
If you’re covering a live, outdoor event, you’ll likely be working with hard/direct or soft/diffused light, depending on the time the event is being held.
Things are a bit trickier for indoor events. If the event hall or room has an adequate number of windows, you can use window light. Alternatively, you can make use of reflected light.
Indoor events with natural lights can also be a curse to work with as they can cause extreme dynamic range issues for camera sensors. So the photographer will need to decide which to expose correctly. And that takes a lot more thinking effort and careful composition choices to make it work.
Festivals, whether music or community fairs are all pretty much outdoors. As they start in the morning and the light transitions from long shadows to harsh over light then again to long shadows. The event photographer will need to be constantly making adjustments to their shooting style and settings to present a consistent look to the marketing team.
Mixing artificial light with natural ambient light is recommended to give you a degree of control in moderating the shadow lines and quality of light.
Event photography can appear easy at first glance in well lit outdoor events but when you get down to the detail it requires a great understanding of direction, quality, intensity and how to have some control of your subject.
Creatively use Dapple light in Landscape photography
Timing and some luck using dapple light in landscape photos

Have you seen the light in a different way now?
You’ve come this far, which means you’ve probably picked up a thing or two about natural light and its various applications in photography.
And that’s great. Truly.
As without light there is no photography.
But it’s only just the first step. To truly master the use of natural light you have to go out and practice. It’s when you practice consistently that you’ll be able to fully understand how light affects photography, that knowledge is truly liberating for photographers.
So, don’t be afraid to head out, even if the weather turns on you. Remember, there’s no bad light, only suitable light. Examine the light, figure out what scene is perfectly suited to it, and create a masterpiece.
